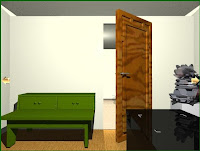
 Welcome.I hope this a text Solution useful.Start this game
the green/blue button above the "about items" box changes rooms. Knowing this will save you lots of anguish!
there are separate inventories for the two rooms; you can transfer things from one room to another by placing them on a desk on either side of the door.
1. take penguin from bookshelf
2. go left and take the block from the second middle shelf, the pencil from the glass on the table, and click on the blue book that is sticking out on the right shelf, third row from top. Take the bookmark from the book.
3. view penguin and turn him around. insert bookmark into slot on back of head and take the "blue heart" key.
4. go left and click behind the desk for a new view. Use the key on the top right drawer and take the block. Also take the block from the left middle drawer.
5. go left and click on the right cabinet door of the green desk. Take the block. back up and click the open space in the doorway. Place the four blocks and the penguin on the desk.
6. click green button to change rooms. take prism and fifth block from below tv.
7. go left. Pay no attention to that man in the doorway! take the blocks and the penguin off the desk. take wooden board from lower left cabinet.
8. click to see the right side of desk. take the "red heart" key and use it to open the first drawer of the desk. take the block.
9. go left and click twice on the airplane on the table to get a closeup view. place the prism on the square.
10. back up once and notice there is now a black switch on the left side of the stand the plane is on. flip the switch to activate the laser.
11. open the cabinet doors and take the photo (it says "jenny" on the back) and the oval mirror.
12. back up and see that the laser points to a spot by some hooks on the ceiling. leave them for now and go left.
13. click the child's drawing on the wall and note that "Inverted" is written on the back. click the next child's drawing (back is blank).
14. go left twice. the man won't let you click through the door, so use the blue button, then use it to click back to the second room. Now you can click the opening in the doorway to get access to the green table on the other side. Place the "cat" drawing and the oval mirror there and go back to the first room using the button.
15.retrieve the mirror and the cat drawing from the green table. Look at the back of the cat drawing and use the pencil to reveal a four digit number.
16. back up and go right. click on the metal cat sculpture, then click on its tail just to the right/center to see that the other side of the sculpture is a goose. below the goose the outline of the top of a door is visible
17. click on the door and enter the code from the cat picture into the keypad. take the square mirror and place it on the wooden table in the second room, then use the button to go back to the second room.
18. take the square mirror and hang it on the ceiling hooks, where the laser beam is pointing.
19. go back to the first room and hang the oval mirror on the hooks above the desk.
20. go back to the second room and highlight the wooden board and assemble the blocks on it. you now have a map of the first room. Place this map on the green table through the doorway, then go back to the first room.
21. take the assembled map and place it on the desk where the square indicates. Note where the laser beam hits the map and go there (it is a spot in the middle of the floor).
22. open the trap door and take the credit card. you can now go back to the second room and leave through the door for "first ending"
Walkthrough for "second ending"
1. go to second ending and look at the plane.
click on the photo of the girl in your inventory and turn it over so "Jenny" is visible. also make sure the picture with "inverted" is turned over AND that the penguin is turned over.
2. turn the laser off and click on the plane to see the underside. take the stamp off the wing. Now we see the meaning of "24 cents" on the penguin! you can now exit through the door or go back to the first room and go through the door between the two rooms.
3. exit the room. there may be more, but I never could use the stamp or transfer it or the credit card from one room to another. The card looked like it was missing half. if anyone finds another end, please share!
Source: Escape Games 24

0 yorum:
Post a Comment
Note: Only a member of this blog may post a comment.